
Propeller Propulsion!
DefineChallenge: To develop a propeller/rubber band powered, balsa wood framed aircraft that stays aloft for the longest amount of time possible.
|
|
Challenge Rules & Guidelines
- Example Video
- The Wing Span of your aircraft must not exceed 40 cm.
- The Fuselage of your aircraft must not exceed 40 cm.
- The total mass of your aircraft frame and wing material should not exceed 20g.
- All framing for this project must be made from provided materials.
- No materials for this project will be given out until
Learning Activities
The Four Forces of Flight
Lift- Airfoil
- How Things Fly Website: Four Forces of Flight
- NASA Forces of Flight Web Resources: Basics, Unbalanced Forces , Balanced Forces, Worksheet
- MIT video explaining the 4 Forces of Flight
Lift- Airfoil
- Airfoil 1 video on Youtube explaining the how the concept of how the design of a wing affects the performance of an aircraft.
- NASA Explanation sheet on Airfoil and Lift. Very Technical.
- NASA Explanation sheet on Lift from Pressure. Very Technical.
- NASA Explanation sheets Number 1 and Number 2 on incorrect Airfoil theories. Very Technical.

|

|
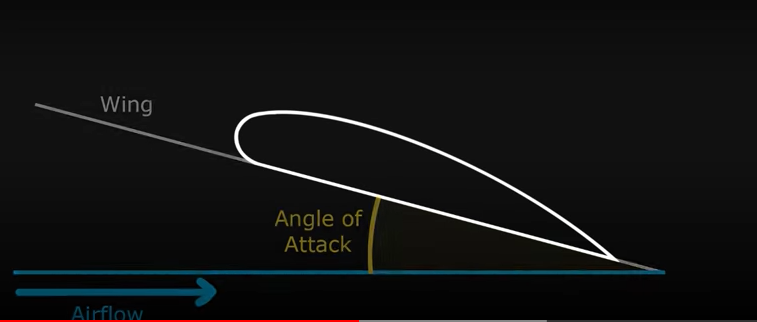
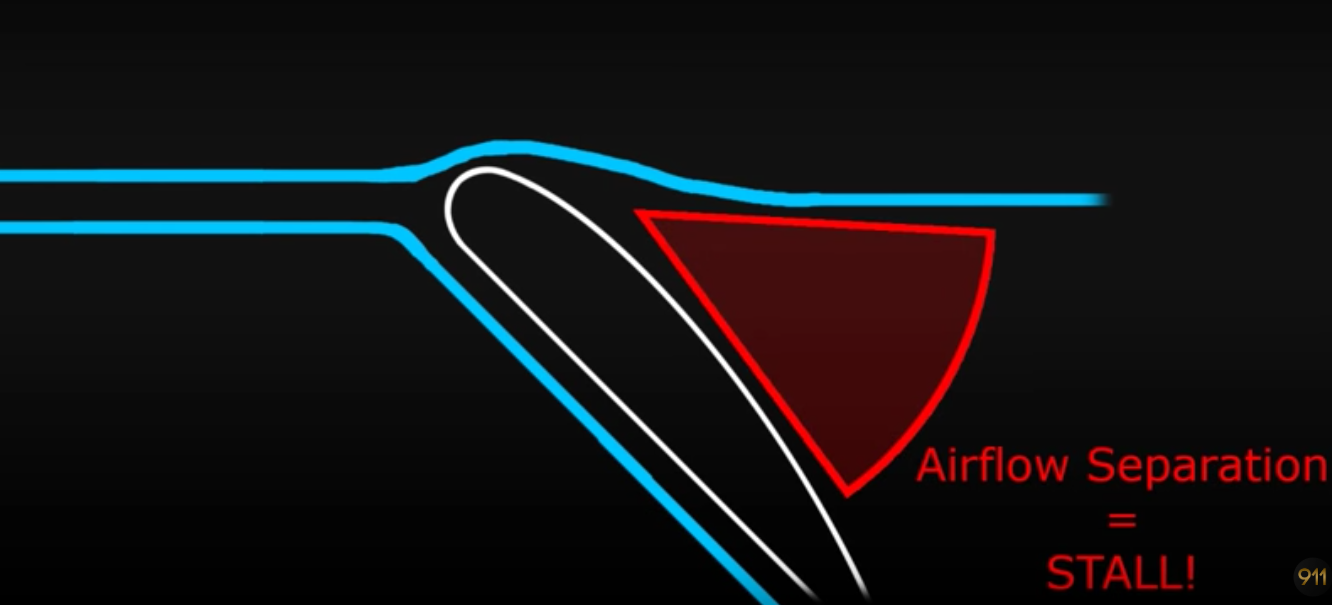
Lift- Angle of Attack
|
|
Design
Balsa Wood Framed Aircraft Research & Rough Draft Development
|

Balsa Frame Aircraft Wing Design Possibilities - Front View

|
Main Wing Technical Design
Goal: Use your Balsa Wood Framed Aircraft Rough Draft Development as a guide to create a technical drawing of your main wing part(s).
- Thinking about your Main Wing Design, decide how many panels will make up your main wing. Any place where there is a change in angle or look, a new panel is established. This should be reflected in your top sketch perspective.
- Draw your front main wing view FIRST. This drawing is to be at real life scale, or 1:1 scale. Remember, that means you are drawing the actual size of what your creation is going to be. This drawing will also cause you to think about the panels you need to construct.
- Now use your Top View Main Wing area to draw out your main wing panels. Plan you use of this space wisely, depending on the number of panels you need. Again, these drawings need to be at 1:1 scale. You will use these drawings as your patterns for construction!
- When finished, take a moment now to really darken and thicken your technical drawing lines. Keep dimension information lighter.
- Wrap your technical drawing with wax paper as demonstrated in class.
